We are made up of millions of cells and thanks to science, we know exactly what these cells look like and what they contain! But how? They're so tiny that you can't see them with the naked eye. This is where a very clever invention called 'the microscope' comes in!
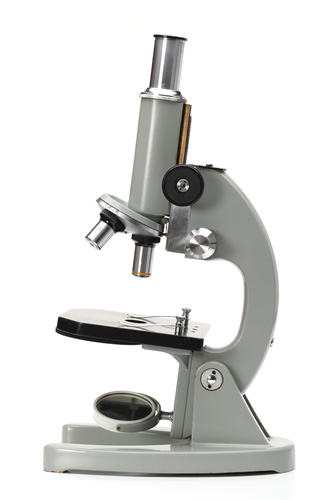
A microscope allows us to magnify or 'zoom in' on the cells and be able to see what is contained within them. Being able to do this is very useful as it helps us to develop our understanding of the different parts of the cells and their roles. The image below is of a light microscope and you may well be familiar with one, or have had the opportunity to use one, already.

In this worksheet, you will become familiar with the different parts of the light microscope and be able to describe their functions.
The diagram below shows a microscope which has been labelled with its key parts.
So what do all the different parts do?
Eyepiece lens - This is the part of the microscope that you look through. It is usually a x10 magnification lens.
Objective lens - There are usually three of these lenses, all of different strengths, which are aimed at the specimen you are looking at. You can rotate these lenses around to have more or less magnification, depending on what is most suitable for your sample. They are usually set at x4, x10 and x40 magnification.
Stage - This is the flat part of the microscope on which you place the slide containing the specimen you want to magnify.
Arm - This connects the top half of the microscope with the bottom half. This is the part you should always hold when transporting a microscope around.
Base - This is the flat part at the bottom of the microscope which supports it when placed down on a surface. When transporting a microscope, you should place one hand under the base and hold the arm of the microscope with the other hand.
Slide and clips - The slide is a rectangular shape of perspex or glass-type material which holds the specimen you wish to look at under the microscope. You position it on the stage underneath the objective lens and then hold it in place with the clips, so that it does not move around.
Mirror - On some microscopes there will be a mirror which you position towards the light, so that the light is directed up through the bottom of the stage and onto the slide. More modern microscopes have a lamp now fitted into the base. You simply plug them in and turn the lamp on and light is directed up through the bottom of the stage.
Focusing Wheels - These wheels move the stage up and down to move the slide closer or further away from the objective lens. This allows the user to bring the slide into focus.
Let's move on to some questions now.


